
Arduino開発&Lチカ
『ESP32-DevKitC のArduino開発環境インストールとLチカ実行』
この文書は次のコミュニテイのために作成しました。
ESP32関連のArduino開発環境はネット上に多々公開されているので、新しく作成する必要もないのですが広島で開催するハードウエアのコミュニテイ用に作成しました。
Solid State Science Hiroshima
ハードウェア勉強会
作成日時 2018-06-23 17:38 更新日時 2018-06-25 10:33
更新日時 2018-06-23 19:01

ESP32開発元
ESP32-DevKitC
https://www.espressif.com/en/products/hardware/esp32-devkitc/overview
ESP32-DevKitC V4 Getting Started Guide
http://esp-idf.readthedocs.io/en/latest/get-started/get-started-devkitc.html
Arduino with ESP32
https://github.com/espressif/arduino-esp32
ESP32の開発ボードの例(秋月電子通商)
ESP32-DevKitC (ESP-WROOM-32 )をArduino開発環境で開発するためのインストールとLチカまでの手順です。基本的にmacOSとWinでは同一の手順でインストールできます。
1.開発環境のダウンロード
2.ESP32-DevKitC用のシリアルドライバーをダウンロード
3.開発環境(Arduino)のインストール
4.ESP32-DevKitC用のドライバーをインストール
5.EPS32関連のArduino環境をインストール
6.Lチカ配線
7.プログラム&実行
インストール環境/条件
・macOS 10.13
・Arduino 1.8.5
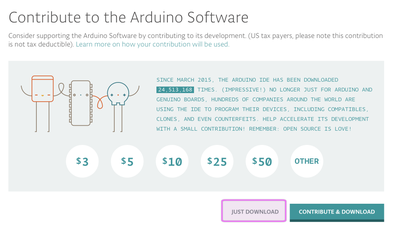
【1.開発環境のダウンロード】
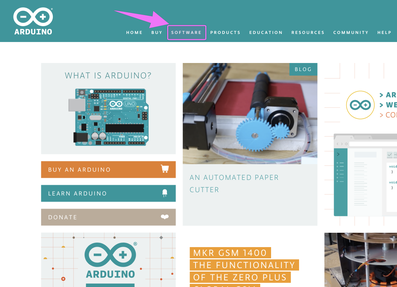
SOFTWARE
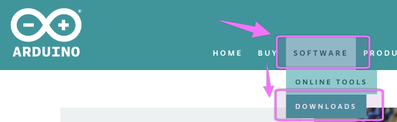
DOWNLOAD
IDE

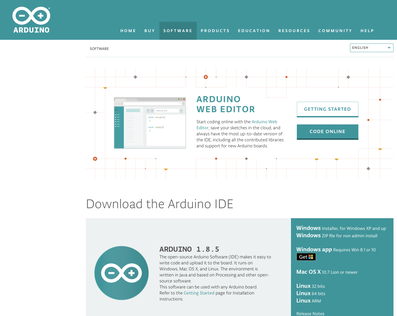
該当するPC(ここではmacOS)用のIDEをダウンロードする。
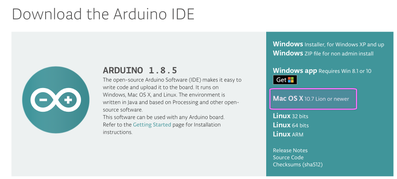
macOS
ダウンロード
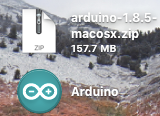
ダウンロード結果(例)
Arduino 1.8.5
arduino-1.8.5-macosx.zip Mac OS X 10.7 Lion or newer
arduino-1.8.5-windows.zip Windows app Requires Win 8.1 or 10
【2.ESP32-DevKitC用のシリアルドライバーをダウンロード】

今回使用するESP32の開発ボード

回路図からUSBシリアルの使用ICは「CP2102(Silicon Laboratories)」です。
(主な使用にも明記)
シリアル⇔USB変換チップ: CP2102(Silicon Laboratories)
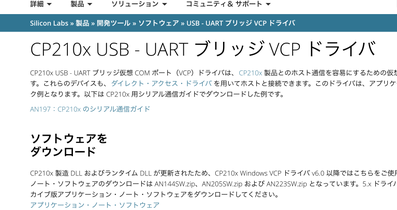
Silicon Laboratories社のWebページから該当PC用のUSBドライバーをダウンロードします。
CP210x USB - UART ブリッジ VCP ドライバ
https://jp.silabs.com/products/development-tools/software/usb-to-uart-bridge-vcp-drivers

macOS用
Release Dates
-------------
CP210x Macintosh OSX VCP Driver 5.0.4 - January 19, 2018
CP210x Macintosh OSX VCP Driver 5.0.3 - November 21, 2017
CP210x Macintosh OSX VCP Driver 5.0.2 - October 12, 2017
,,,,,,,,,,,,,,,,,,
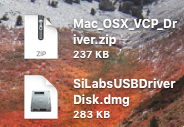
ダウンロード-ドライバー
Mac_OSX_VCP_Driver.zip
【3.開発環境(Arduino)のインストール】
ダウンロードファイルの展開
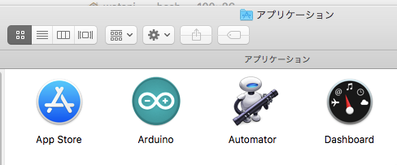
アプリケーションフォルダへ移動(もしくは コピー)
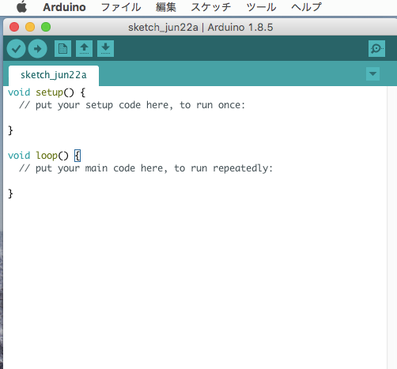
アプリケーションの起動を確認
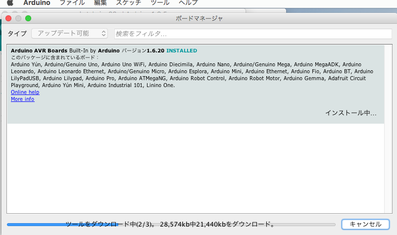
基本ライブラリを最新へUpdate。
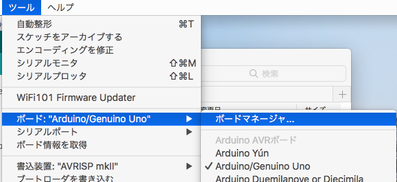
> 「ボードマネージャー…」を選択
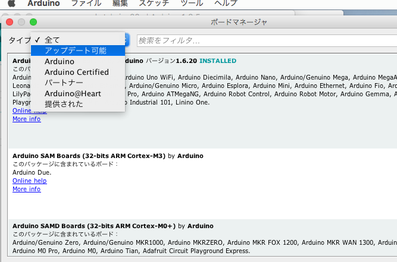
「アップデート可能」のライブラリを確認しすべてをアップデート
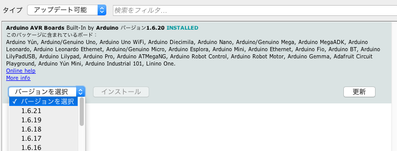
最新へアップデート
【4.ESP32-DevKitC用のドライバーをインストール】
ESP32-DevKitCを接続してUSBの状態をターミナルで確認
$ ls -l /dev/tty.*
crw-rw-rw- 1 root wheel 32, 0 6 22 10:28 /dev/tty.Bluetooth-Incoming-Port
PC用のUSBドライバーを展開
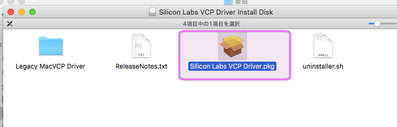
インストールの実行
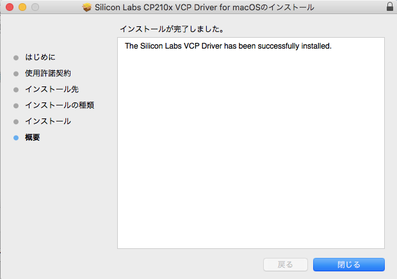
インストール後、ターミナルで確認。
$ ls -l /dev/tty.*
crw-rw-rw- 1 root wheel 32, 0 6 22 10:28 /dev/tty.Bluetooth-Incoming-Port
crw-rw-rw- 1 root wheel 32, 2 6 22 12:09 /dev/tty.SLAB_USBtoUART
$
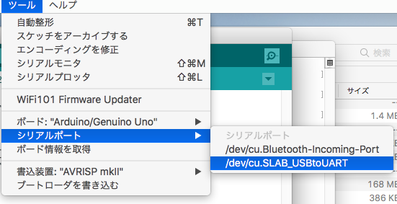
インストール後、アプリ「Arduino」で確認。
ツール > シリアルポート > /dev/tty.SLAB_USBtoUART
一度「終了」。
【5.EPS32関連のArduino環境をインストール】
ESP32 サイト
https://github.com/espressif/arduino-esp32
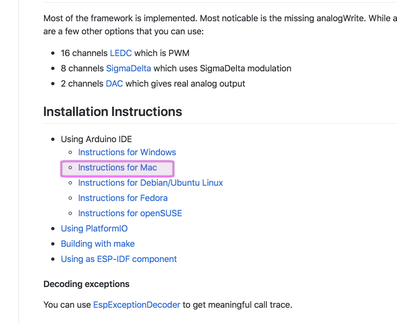
ESP32関係はArduinoのボードマネージャーではインスツールできないのでESP32のWebページのスクリプトに従ってインストールする。
インストールスクリプト
https://github.com/espressif/arduino-esp32/blob/master/docs/arduino-ide/mac.md
ターミナルで次を実行
mkdir -p ~/Documents/Arduino/hardware/espressif && \
cd ~/Documents/Arduino/hardware/espressif && \
git clone https://github.com/espressif/arduino-esp32.git esp32 && \
cd esp32 && \
git submodule update --init --recursive && \
cd tools && \
python get.py
実行結果
MacBookPro13-VMWare-Arduino:~ wotani$ mkdir -p ~/Documents/Arduino/hardware/espressif && \
> cd ~/Documents/Arduino/hardware/espressif && \
> git clone https://github.com/espressif/arduino-esp32.git esp32 && \
> cd esp32 && \
> git submodule update --init --recursive && \
> cd tools && \
> python get.py
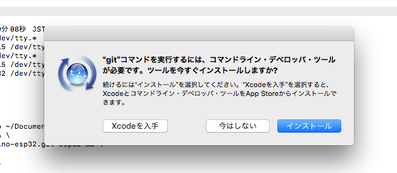
macOSのむXcode環境でESP32に不足している場合には新しいデベロッパーツールが必要になる。
Xcodeを使用していない場合も同様。
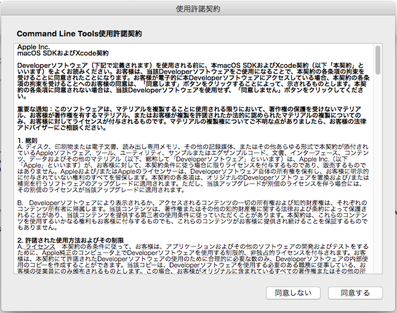
お約束の「使用許諾書」の同意。
ダウンロード
インストール完了
xcode-select: note: no developer tools were found at '/Applications/Xcode.app', requesting install. Choose an option in the dialog to download the command line developer tools.
$
Xcodeのツールをインストール後に再度実行。
$ mkdir -p ~/Documents/Arduino/hardware/espressif && cd ~/Documents/Arduino/hardware/espressif && git clone https://github.com/espressif/arduino-esp32.git esp32 && cd esp32 && git submodule update --init --recursive && cd tools && python get.py
Cloning into 'esp32'...
remote: Counting objects: 8051, done.
remote: Compressing objects: 100% (60/60), done.
……..
……..
……..
Receiving objects: 100% (8051/8051), 115.51 MiB | 727.00 KiB/s, done.
Resolving deltas: 100% (4685/4685), done.
Submodule 'libraries/AzureIoT' (https://github.com/VSChina/ESP32_AzureIoT_Arduino) registered for path 'libraries/AzureIoT'
Submodule 'libraries/BLE' (https://github.com/nkolban/ESP32_BLE_Arduino.git) registered for path 'libraries/BLE'
Cloning into '/Users/wotani/Documents/Arduino/hardware/espressif/esp32/libraries/AzureIoT'...
Cloning into '/Users/wotani/Documents/Arduino/hardware/espressif/esp32/libraries/BLE'...
Submodule path 'libraries/AzureIoT': checked out '67dfa4f31ef88b0938dd87d955612100dea5562e'
Submodule path 'libraries/BLE': checked out 'af865a916795289c8e7e09b091ff2140c33fc3fe'
System: Darwin, Info: Darwin-17.6.0-x86_64-i386-64bit
Platform: x86_64-apple-darwin
Downloading xtensa-esp32-elf-osx-1.22.0-80-g6c4433a-5.2.0.tar.gz
Done
Extracting xtensa-esp32-elf-osx-1.22.0-80-g6c4433a-5.2.0.tar.gz
Downloading esptool-da31d9d-macos.tar.gz
Done
Extracting esptool-da31d9d-macos.tar.gz
Downloading mkspiffs-0.2.2-arduino-esp32-osx.tar.gz
Done
Extracting mkspiffs-0.2.2-arduino-esp32-osx.tar.gz
Renaming mkspiffs-0.2.2-arduino-esp32-osx to mkspiffs
Done
$
インストールの確認
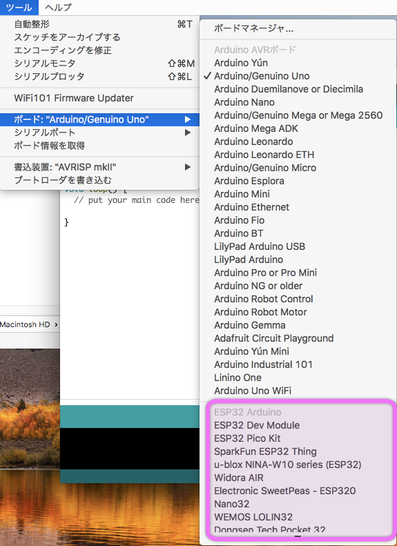
「Arduino」アプリケーションを 再起動し確認
「ボードマネージャー…」に「ESP32」関連が追加されていれば成功。
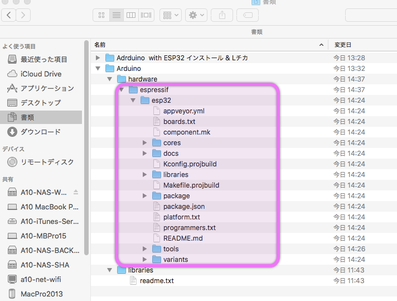
インストール後のフォルダ構成例
【※※※※※※※※】
ここまでで、Arduino環境下でESP32を開発する環境が整った事になる。
【6.Lチカ配線】.ESP32-DevKitC
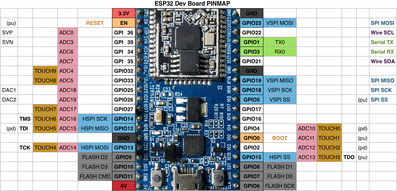
.ESP32-DevKitCのPORTの割り当て。
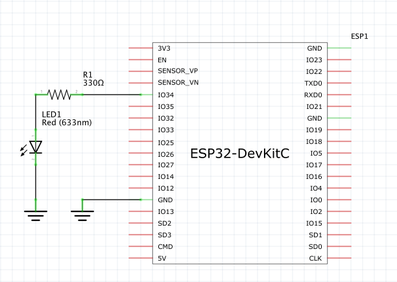
回路図
IO34へ抵抗「330Ω」と「LED」を接続します。
補足: 回路図に問題がある場合にはその場で修正
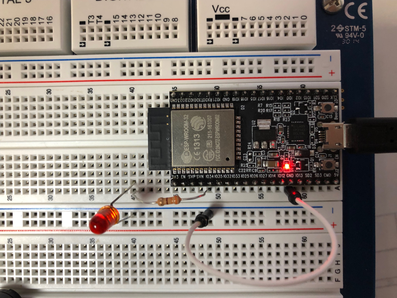
こんな感じ。。。
【7.プログラム&実行】
Step1: ESP32-DevKitCをUSBでPCと接続します。
Step2: ArduinoをESP32用に設定
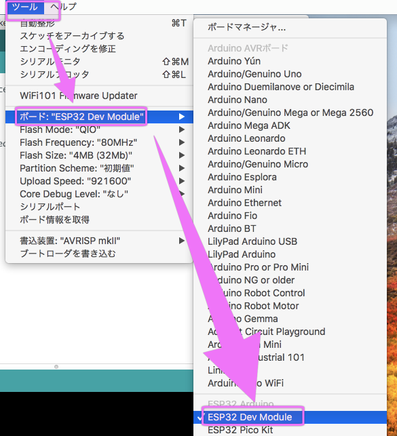
ボードの設定
「ツール」 > 「ボード」>「ESP32 Dev Module」
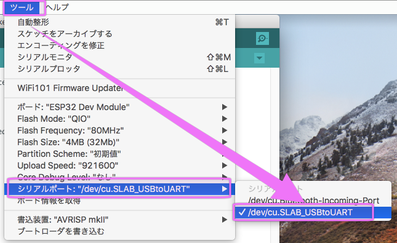
ESP32が接続されたUSBを選択します。
「ツール」 > 「シリアルポート」>「……/cu.SLAB_USBtoUART」

「各種設定状態」
Step3: 最初のテストプログラム1
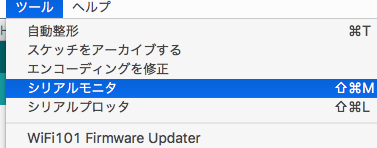
「シリアルポートにメッセージを表示」
「出力」
例
「スケッチ」メニュー
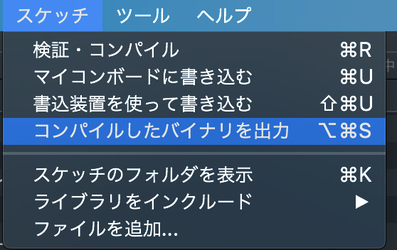
次の2つのコマンドを主に使います。
・検証・コンパイル
・マイコンボードに書き込む
次のコードを入力し「検証・コンパイル」
問題なければ書き込みます。
「マイコンボードに書き込む」
HelloEPS32.ino
―――
/*
* EPS32 dev board
*
* 2018-06-16 02:02
*/
void setup() {
// put your setup code here, to run once:
Serial.begin(115200, SERIAL_8N1);
}
void loop() {
// put your main code here, to run repeatedly:
Serial.println("こんにちは ESP32");
delay(1000);
Serial.println("はい");
delay(1000);
}
―――――
Step4: LEDチカ
次のコードを入力し「検証・コンパイル」
問題なければ書き込みます。
「マイコンボードに書き込む」
/*
* EPS32 dev board L-Chika
*
* 2018-06-16 02:02
*
* IO34~IO39はプルアップ無し
*/
#include <WiFi.h>
#define LED_PORT 34
void setup() {
// put your setup code here, to run once:
WiFi.mode(WIFI_OFF);
Serial.begin(115200, SERIAL_8N1);
Serial.println("");
Serial.println("こんにちは ESP32");
pinMode(LED_PORT,OUTPUT);
digitalWrite(LED_PORT,LOW);
}
void loop() {
// put your main code here, to run repeatedly:
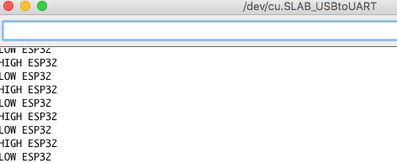
digitalWrite(LED_PORT,LOW);
Serial.println("LOW ESP32");
delay(1000);
digitalWrite(LED_PORT,HIGH);
Serial.println("HIGH ESP32");
delay(1000);
}
ESP32でLチカできましたか?